Why damp bottles undo a good sterilise in Australia
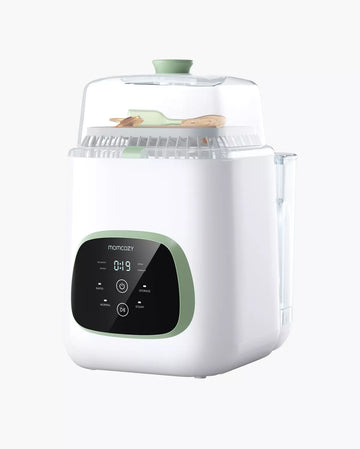
Australian kitchens are humid for half the year, and that changes how drying behaves. A bottle that comes out of the steam cycle wet, gets shaken twice and left upside down on the sink drainer will still have water pooled in the base and sitting inside the collar when you reach for it at the 2am feed. Drying is the step that decides whether that sterilise was worth the electricity. If drying is the part that keeps slipping, an all-in-one unit such as the Momcozy KleanPal Pro runs the wash, the 100°C steam sterilise and the dry in one cycle, so nothing sits wet waiting for a free hand.
 Member price
From$549.99Code Save 25%
 Member price
$589.00
$619.00Code Save 25%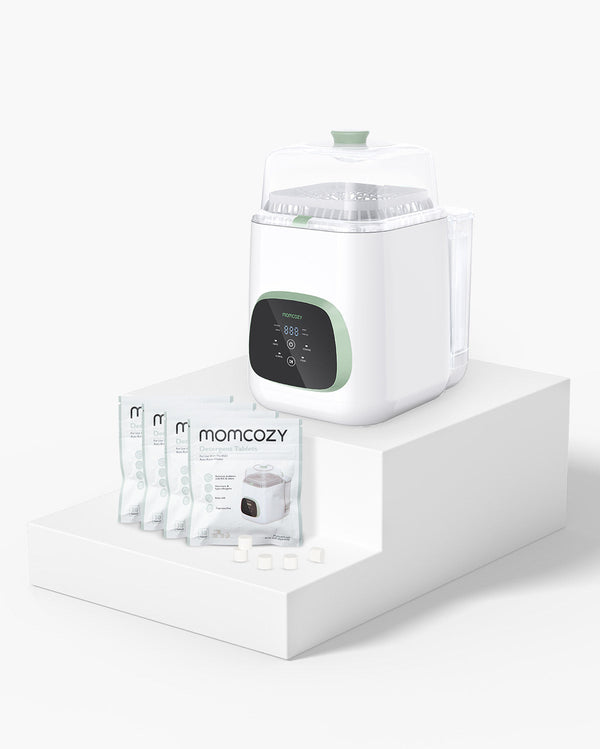 Member price
$552.99Code Save 20%
- Bacteria need moisture, not milk. Pregnancy, Birth and Baby describes milk as the perfect medium for bacteria to grow in, and a bottle that has been sterilised but left damp hands germs a fresh start.
- Dust settles on wet surfaces. Residual water inside a bottle picks up dust and fine particles from the air, so a just-sterilised bottle can be re-contaminated before it is even capped.
- Formula scoops go in by ratio. Extra water left in the bottle dilutes the feed and throws out the powder-to-water ratio on the tin.
- Hard water leaves a film. If your tap water is hard, water left to evaporate leaves a mineral haze on the inside wall that looks like a dirty bottle.
- Trapped water ages the parts. CHOICE notes that silicone stands up to repeated washing, boiling and sterilising while rubber teats go sticky and friable, and keeping either wet between uses shortens that working life.
Momcozy KleanPal Pro at a glance
- Up to 4 bottles in one cycle, plus teats, collars and dummies, washed by 26 multi-angle jets at 22,000Pa.
- Nine mode combinations, including Rapid Wash at 19 minutes, Normal Wash at 29 minutes, Sterilise + Dry at 60 minutes and Storage for up to 72 hours.
- 100°C steam sterilising; Momcozy rates the cycle at 99.9% germ elimination.
- 2.5-litre tank per cycle, using up to 86.7% less water than hand washing and up to 94.7% less than a standard dishwasher.
- Food-grade, BPA-free parts and a direct drainage hose, so nothing sits in dirty water.
- 60 bottle washer tablets in the box; top up with washing tablets for the KleanPal Pro and descale every 20 cycles.
- A$549.99, with a 1-year warranty.
 Member priceFrom$549.99Code Save 25%
 Member price$589.00
$619.00Code Save 25% Member price$552.99Code Save 20%
Three ways to dry sterilised bottles
Every method below works; they simply trade time against effort.
Method 1: Let a washer-dryer finish the cycle
This is the set-and-forget option, and the one that survives a bad night. Load the clean bottles, teats and collars into their positions, press the mode you want and walk away. The machine runs the wash, the steam sterilise and a warm dry, then holds the load on Storage until you open the door. Three steps, no towel:
- Load the bottles, teats and other feeding parts into their marked positions.
- Choose a mode on the touch panel, such as Rapid Wash for a single overnight bottle or Sterilise + Dry for a full day's worth.
- Open the door and take out bottles that are already dry and ready to fill.
The trade-off is honest: it costs more up front than a rack, it takes up bench space, it needs power, and four bottles is the ceiling per cycle. For a household running eight or more bottles a day, that ceiling is the number to think about first.
Method 2: Air drying on a bottle drying rack
Air drying is the cheapest method and, done properly, a very good one. Both Pregnancy, Birth and Baby and the Australian Breastfeeding Association describe the same routine: drain the equipment upside down on clean paper towel or a clean cloth, cover it while it air dries, and make sure no water droplets remain before it goes away.
- Give the bottle air, not a puddle. A rack that holds bottles mouth-down at an angle lets water run out instead of pooling in the base.
- Keep the rack clean and clear. Put it somewhere with airflow, away from the bin, the stove and open windows onto a dusty street.
- Separate every part. Teats, collars, caps and valves dry on their own pegs, not nested inside each other.
- Turn the load once. A half-turn after an hour or so stops water tracking down one side and settling.
- Cover it. A lidded rack or a clean tea towel over the top keeps dust off while the water evaporates.
How long it takes depends entirely on the room. In a dry, air-conditioned kitchen expect 1 to 2 hours. In a humid stretch, or a bathroom-adjacent laundry, allow 4 to 6 hours. On a sticky February day in Brisbane or Darwin, leave them overnight and check the collar thread before you trust them.
Method 3: Towel drying when you are out of time
Sometimes the bottle is needed in ten minutes and the rack cannot help. Towel drying is the fallback, not the routine:
- You are travelling and have no rack with you.
- It is so humid that nothing air dries.
- You are down to the last clean bottle at 11pm.
If you have to towel dry, the cloth matters more than the technique. Use a clean, lint-free cloth kept only for bottles, choose microfibre for absorbency, and replace it often rather than rotating the same tea towel for a week. Paper towel looks hygienic but sheds fibres inside a bottle; if you use it at all, keep it to the outside.
The risks are real and worth naming: even a clean towel carries bacteria, lint can end up in the feed, it is hard to reach the base corners and collar threads by hand, and repeated rubbing can scuff the surface of plastic bottles.
How often do you need to sterilise and dry?
Cleaning happens after every feed, no exceptions. Sterilising is the part that eases off. Pregnancy, Birth and Baby advises washing and sterilising feeding bottles until your baby is 12 months old, and notes that newborns, premature babies and babies with a weakened immune system need the full routine every time. As your baby grows and their immune system matures, your child health nurse is the right person to ask about spacing sterilising out.
Two rules worth taping inside a cupboard door:
- Anything sterilised and not used within 24 hours should go through again before it is used.
- Drying still happens after every wash, whether or not you sterilised that round.
Do bottles need to be completely dry?
Yes, and "completely" is doing real work in that sentence. A dry bottle means the teat, the collar thread, the vent hole and the corners at the base, not just the visible inside wall.
- Bacteria. Even a small amount of moisture gives bacteria somewhere to multiply between feeds.
- Formula concentration. Droplets left in the bottle dilute the feed you just measured out.
- Re-contamination. Moisture attracts dust and particles that land on the surface you just cleaned.
- Mould in storage. A bottle put away damp is the one that smells when you open the cupboard a fortnight later.
How to dry bottles faster
- Shake first. Flick as much water out as you can before the bottle goes anywhere near a rack.
- Use the warm air cycle. If your steriliser has a drying function, run it; warm moving air evaporates water far quicker than still air.
- Break the load apart. Parts nested together dry at the speed of the slowest crevice.
- Rotate every 15 to 20 minutes. Turning the bottle spreads the drying evenly instead of letting one side sit wet.
- Spread across two racks. If you have the bench space, more airflow beats a crowded rack every time.
- Skip the towel entirely. A machine dry removes the step where most contamination creeps back in.
Speed is worth having, but never at the cost of thoroughness. A bottle that is 90% dry is a bottle that will be wet where it matters.
Choosing a drying setup for an Australian kitchen
The local market splits into three shapes. Steam sterilisers with a built-in drying cycle, UV cabinets, and all-in-one machines that wash, sterilise and dry in one drum, as One Fine Baby's steriliser roundup sets out. BabyCenter Australia makes the local case plainly: because Australian climates are humid, wet bottles left sitting breed bacteria, so a built-in drying cycle is the feature to prioritise.
What to check before you buy
- Capacity against your real daily count. Four bottles per cycle covers most formula-fed babies and falls short for twins or a pumping parent.
- A lid or cover. An open rack in a humid kitchen is slower than a closed drying chamber.
- Drainage. A tray that collects water and empties away beats one that holds a pool under the bottles.
- Bench footprint. Measure the space before you fall for the spec sheet.
- Storage mode. Being able to leave a finished load in the machine until morning removes the fiddliest part of the routine.
- Consumables and spares. Tablets, descaling and replacement parts should be easy to get, and Momcozy AU support is reachable through contact.
Where Australian parents buy
Amazon AU, Baby Bunting, Chemist Warehouse and Big W all carry bottle sterilisers and drying racks, and the Momcozy bottle washer range and steriliser range can be compared side by side before you commit. Owner reviews on ProductReview.com.au are worth ten minutes, particularly on drying performance and how loud a unit is overnight.
Member price
From$549.99Code Save 25%
Member price
$589.00
$619.00Code Save 25%
Member price
$552.99Code Save 20%
Frequently asked questions about drying sterilised bottles in Australia
Can I dry sterilised bottles with a tea towel?
Only when you have no alternative. A clean, lint-free cloth kept just for bottles is the least bad option, but towels carry bacteria, shed fibres and cannot reach the collar thread or base corners. Air drying on a rack or a machine dry is better every time.
How long do bottles take to air dry in Australia?
One to two hours in a warm, dry room with good airflow. In humid weather, or in a laundry with the door shut, allow four to six hours, and leave them overnight if the collar thread still feels damp.
Do I need a bottle drying rack if I already have a steriliser?
Not if your steriliser has a drying cycle. If it is a steam-only unit, the bottles come out wet and a rack is essential, because a wet bottle in a closed cupboard is worse than one drying in the open.
Is a UV steriliser better for drying?
UV cabinets dry without water, which is convenient. Pregnancy, Birth and Baby notes there are no national guidelines for the safe use of UV sterilisers in Australia, so treat the drying convenience and the sterilising claim as separate questions.
Can I store sterilised bottles in the fridge?
Yes, in a clean container with a lid, for up to 24 hours, per Pregnancy, Birth and Baby. Anything unused beyond that should be sterilised again before it is filled.
Should bottles be dry before they go into the steriliser?
Shake off excess water but do not towel them. Steam needs water to work, and a dripping-wet bottle just makes the cycle run longer.
How often should I descale a washer-dryer?
Momcozy specifies descaling every 20 cycles. In areas with hard water, scale builds faster, so watch for cloudy marks on the drum and the bottles.
Why do my bottles come out with white marks?
That is usually mineral residue from hard water, not dirt. Descale the machine, and check whether your drying method is leaving water to evaporate on the surface.
The short version for Australian parents
Pick one drying method and repeat it until it is automatic. If you are washing four bottles or fewer a day and have a dry, airy bench, a bottle drying rack and a covered, angled air dry will do the job for nothing but time. If you are washing more, or your kitchen stays humid for months, an all-in-one washer-dryer removes the step where contamination creeps back in, and the Momcozy KleanPal Pro is the one to compare against at A$549.99. Either way, dry is not optional: it is the last two minutes of the sterilise.